# Introduction to My Lists
Lists can be set up to group items that often get requisitioned/ordered together. An example would be when a new employee joins a new laptop and mouse is always required. Sp rather than adding these individually every time a list can be setup and reused.
Benefits of setting up lists
- Saves time spent in searching for items.
- Reduces the likelihood of forgetting to request an item.
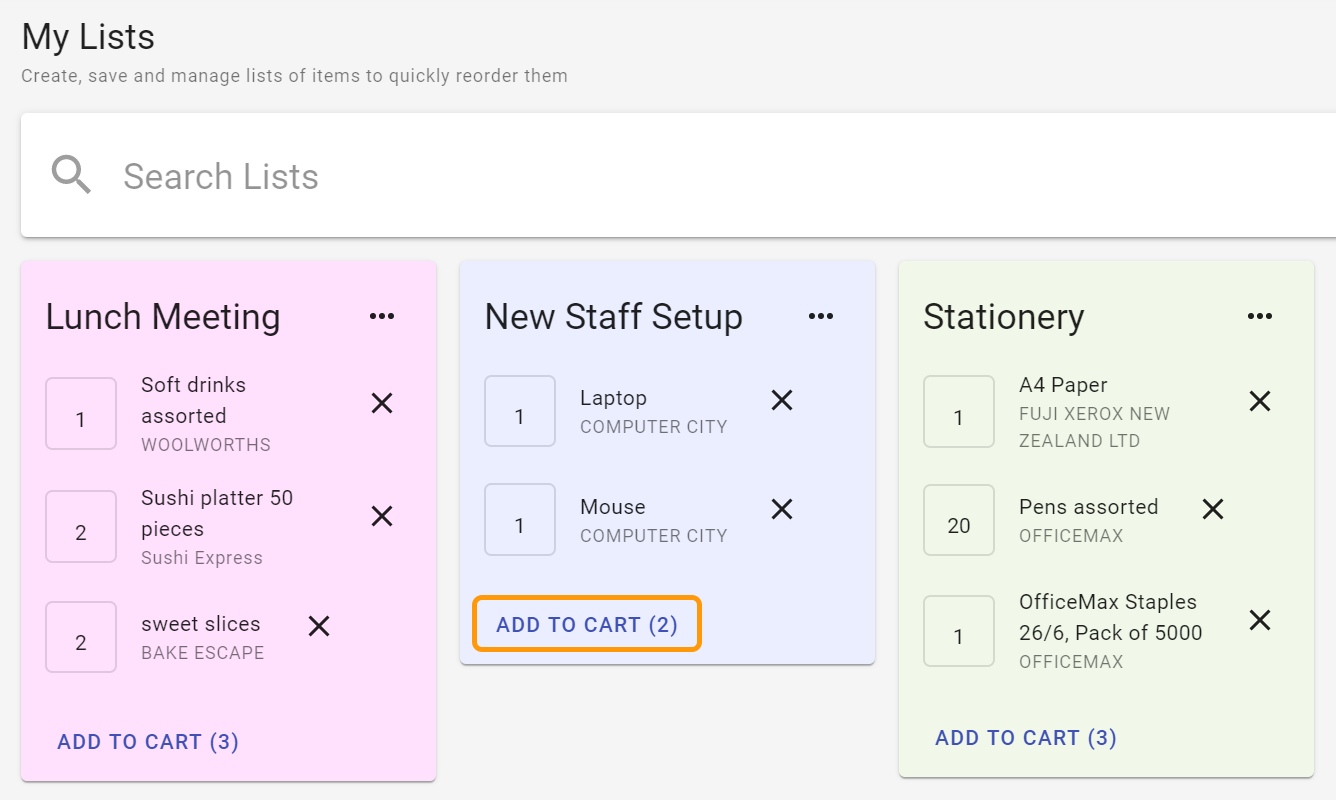
- Purchase Requisitions can be created directly from a List.
# Create New Lists
To set up new lists please select My Lists from the side Navigation Bar.
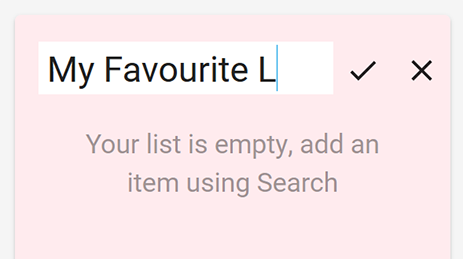
- Click on the CREATE NEW LIST button on the top right of the page.

- Enter a name for the list and press the Enter key or click on the Check mark to save the list.
- Items can be added to the saved list using the Item search result function.
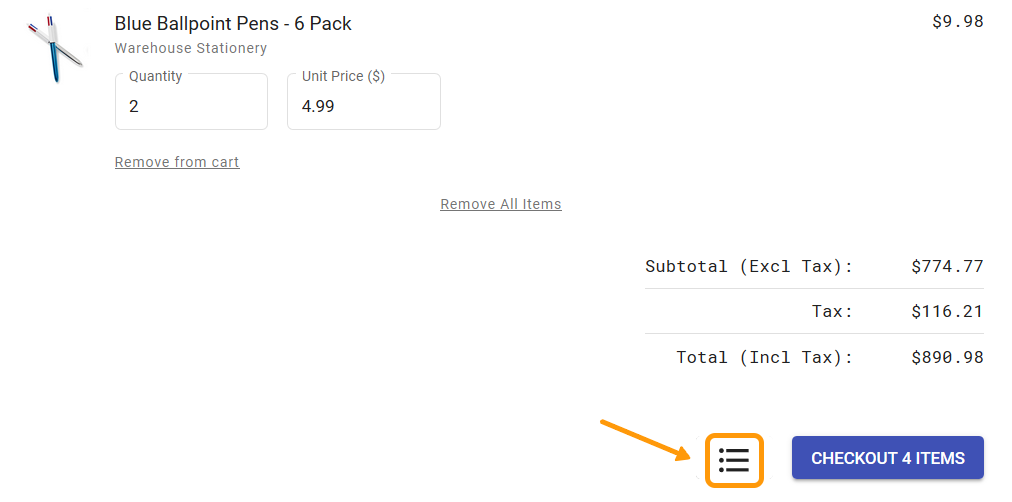
# Create List from Cart
Items added to the shopping cart can be saved to an existing list or to a new list before placing the requisition. This functionality is available from the CHECKOUT ITEM page as well as from the PLACE REQUISITION page.
- Click on the Add to List icon next to the CHECKOUT ITEM or the PLACE REQUISITION button, depending on where you are saving the list from.
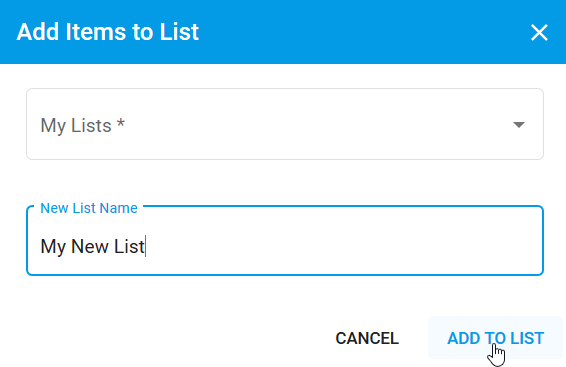
- On the Add Items to List screen click on the My List drop down. This will show existing lists and at the bottom an option to Create new list will be available.
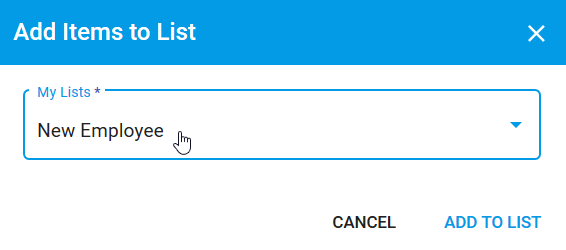
- Choose an existing list from the drop down if you wish to add the items to an existing list. Click on ADD TO LIST to add the items to the selected list. On adding items to an existing list a message will be displayed to let you know that the List has been updated.

- Choose Create new list option to add the shopping cart items to a new list. Provide a name for the new list and click on ADD TO LIST to create a new list and add the items to it.
If the name of an existing list is typed in for creating the new list, an error message is displayed.

TIP
Where an existing list is chosen, ADD TO LIST will ignore the cart item(s) that are already part of that list. In this scenario, the list quantity for the item(s) is NOT updated with the cart quantity.
# Rename a List
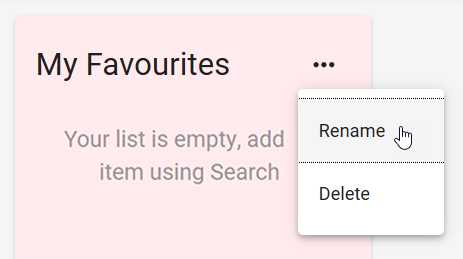
- A saved list can be renamed by clicking on the ellipses on the right side of the name of the list and choosing Rename.
- The list name field is available for editing. Enter the new name and click on the Check mark to save the change.
# Delete a List
- A saved list can be deleted by clicking on the ellipses on the right side of the name of the list and choosing Delete.
- The list is deleted on clicking on the Check mark and cannot be retrieved again.
